
My Motivation
The idea for this plugin came after migrating from Fujifilm to Leica. I had gotten so used to Fujifilm's film simulations that I stopped shooting RAW entirely — there was something about the grain and soft glow in those JPEGs that just felt right, and I liked being able to share straight out of camera with no post-processing whatsoever.
I do not regret switching to Leica, but I do miss that organic film look from Fujifilm. Using my Python programming skills gather throughout years of experience, I started drafting a method that could ease my workflow and deliver convincing and organic film look to my images effortlessly. With that, Organic Film Grain was born. A standalone Adobe Lightroom Classic plugin that can process one or several images at once, applying a convincing grain and glow effect built from the ground up rather than a preset filter. The finished JPEGs can be either automatically grouped with the originals directly in the LrC catalog or exported to a separate folder.
The plugin renders whichever edits you've already applied to the image, generates a full-quality JPEG from that result, and then applies the grain synthesis on top — so your existing workflow stays intact.

Presets + Grain Engine
The workflow has two steps: apply a preset first, then run the plugin.
Each film stock has its own grain profile — a set of fixed glow and grain parameters you can then fine-tune from the plugin's sliders. Rather than one global "grain amount," the engine works in the luminance domain, applying different grain weight and softness (sigma) to highlights, midtones, and shadows separately, closer to how grain actually behaves on real film. Under the hood, the image is textured with multi-octave organic noise, avoiding the flat, uniform look of a simple noise overlay, and grain intensity is masked by local luminance so shadows and highlights don't grain identically.
I wanted the grain effect to look as close as possible to real film stock, behaving differently across tonalities.
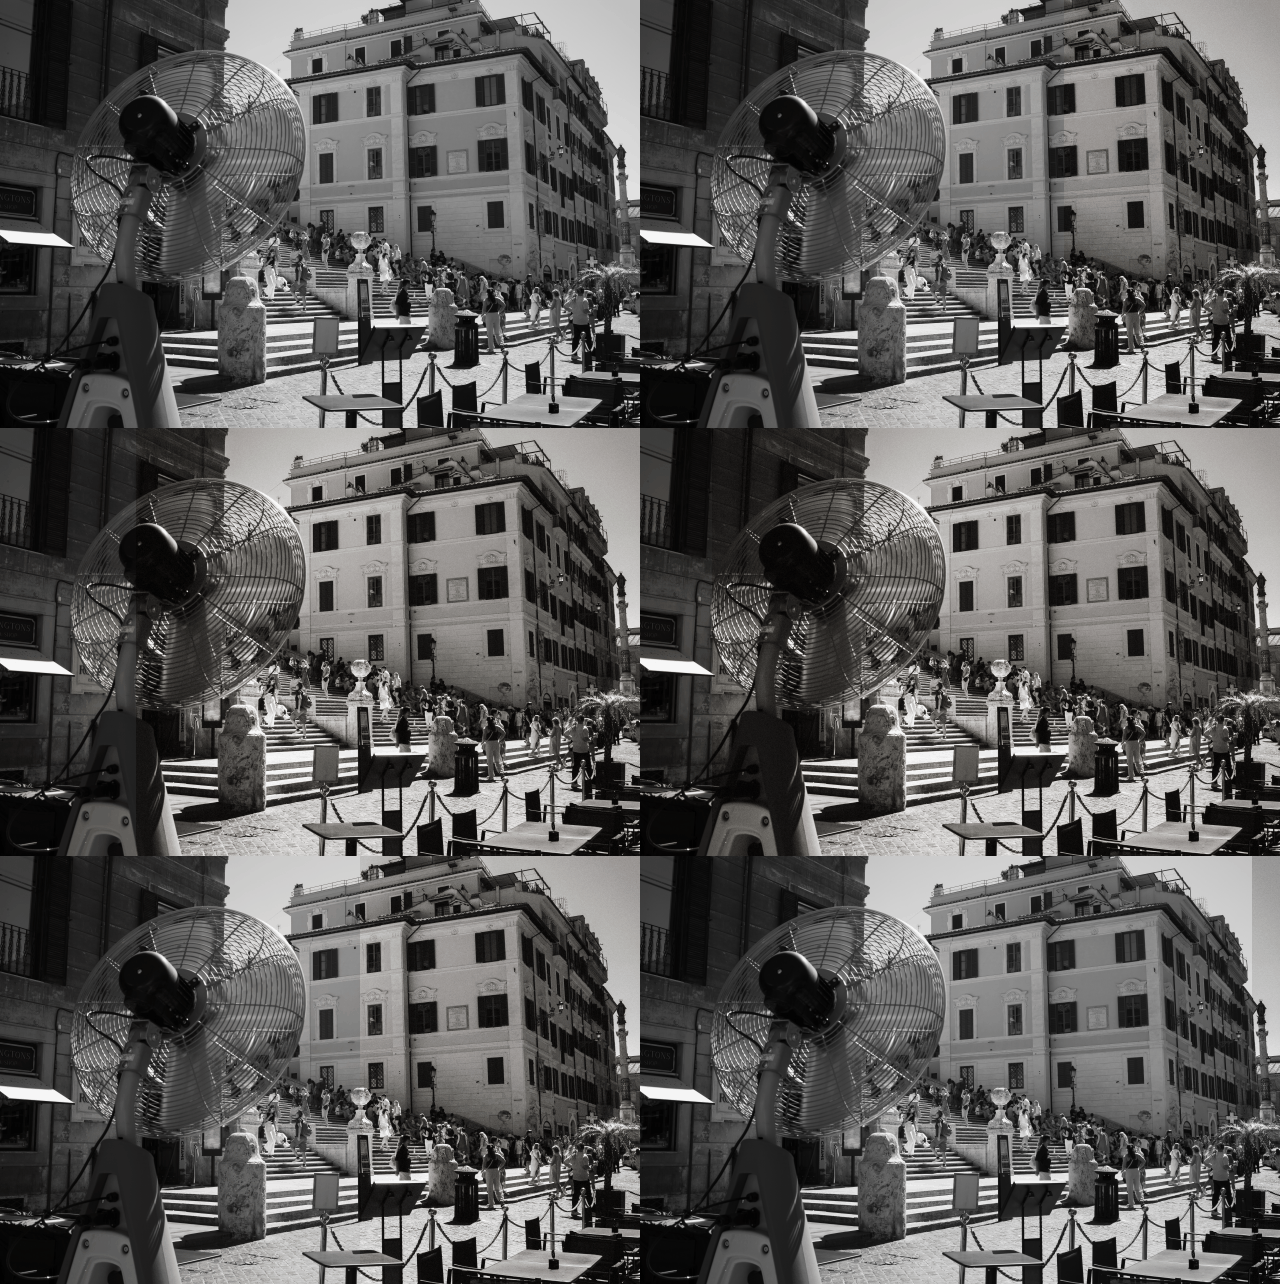
You can check the before and after comparison of a few more sample images below. I have included comparisons using the included picture presets and without them. The idea is to be able to post-process the image however you want, completely separated from the grain effect itself.
By "Full Grain Profile" I mean that the image was obtained applying the *.xmp preset plus the grain effect with glow option toggled "On".

Examples: grain, glow, and presets in action
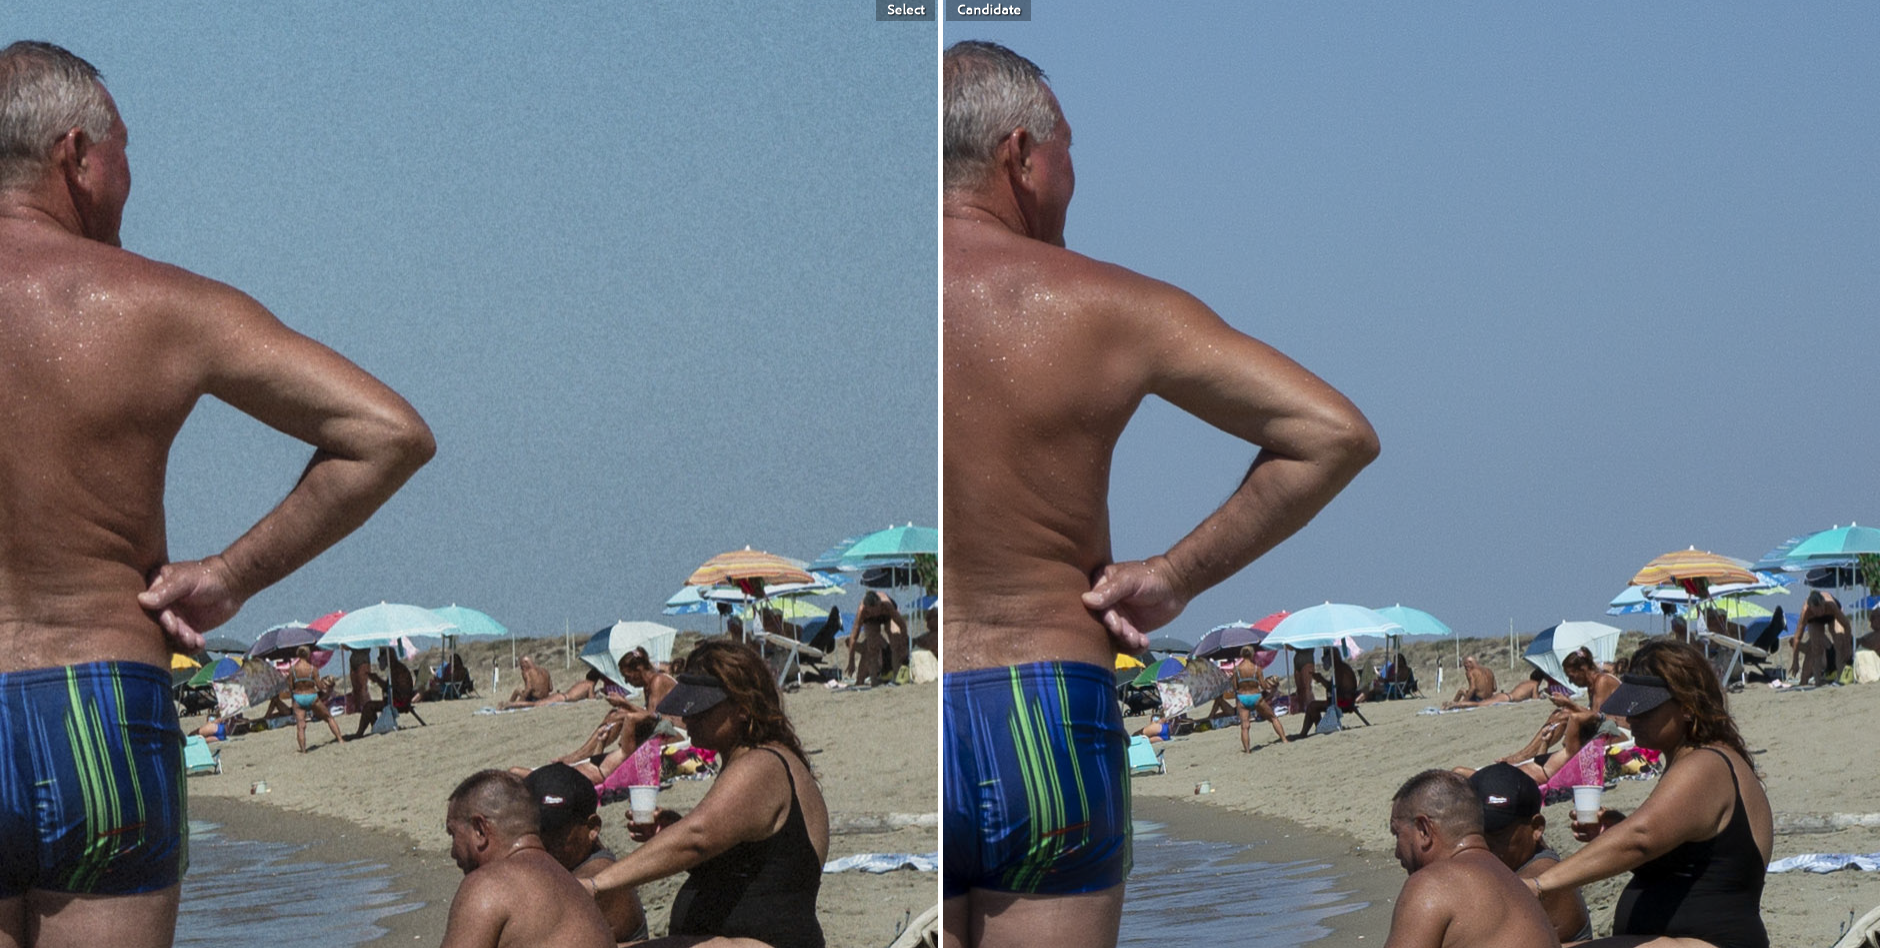
Left: Portra 400 Full Grain Profile (grain tuned down to 50%);
Right: Original DNG file.
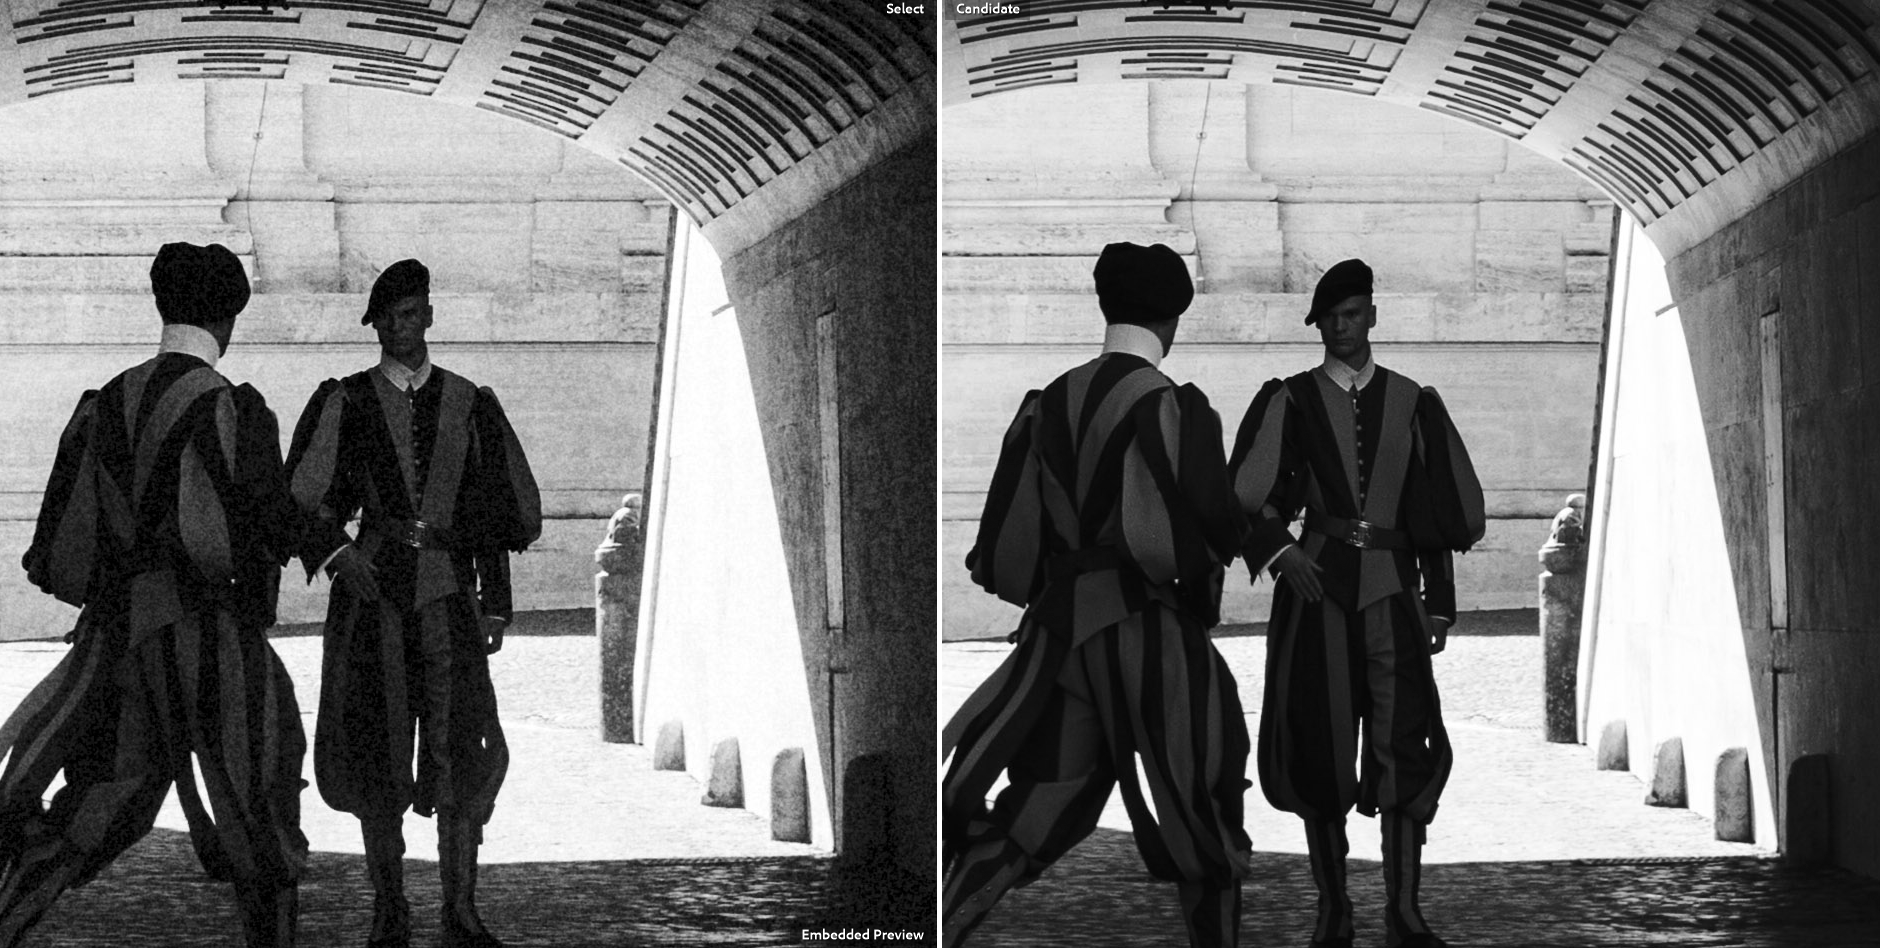
Left: Tri-X 400 Full Grain Profile applied;
Right: Original DNG file with Tri-X 400 low contrast preset applied.
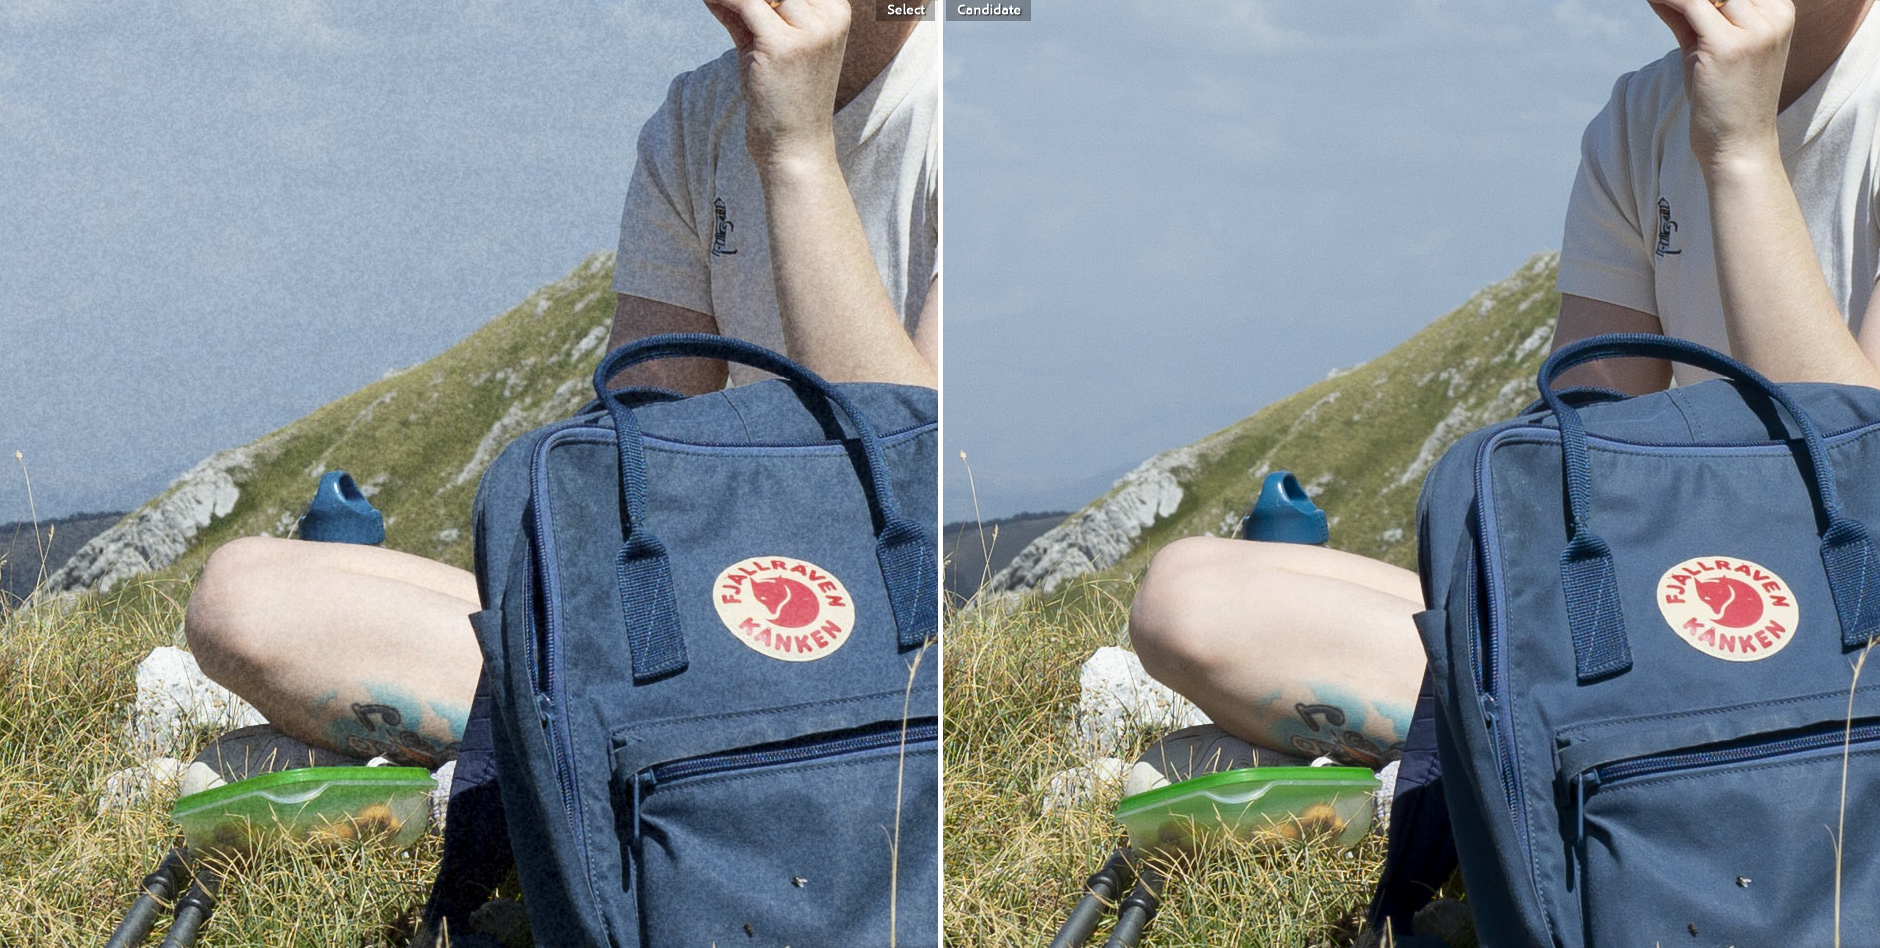
Left: Portra 400 Grain Profile + Glow applied (no preset);
Right: Original DNG file with custom curve adjustments.
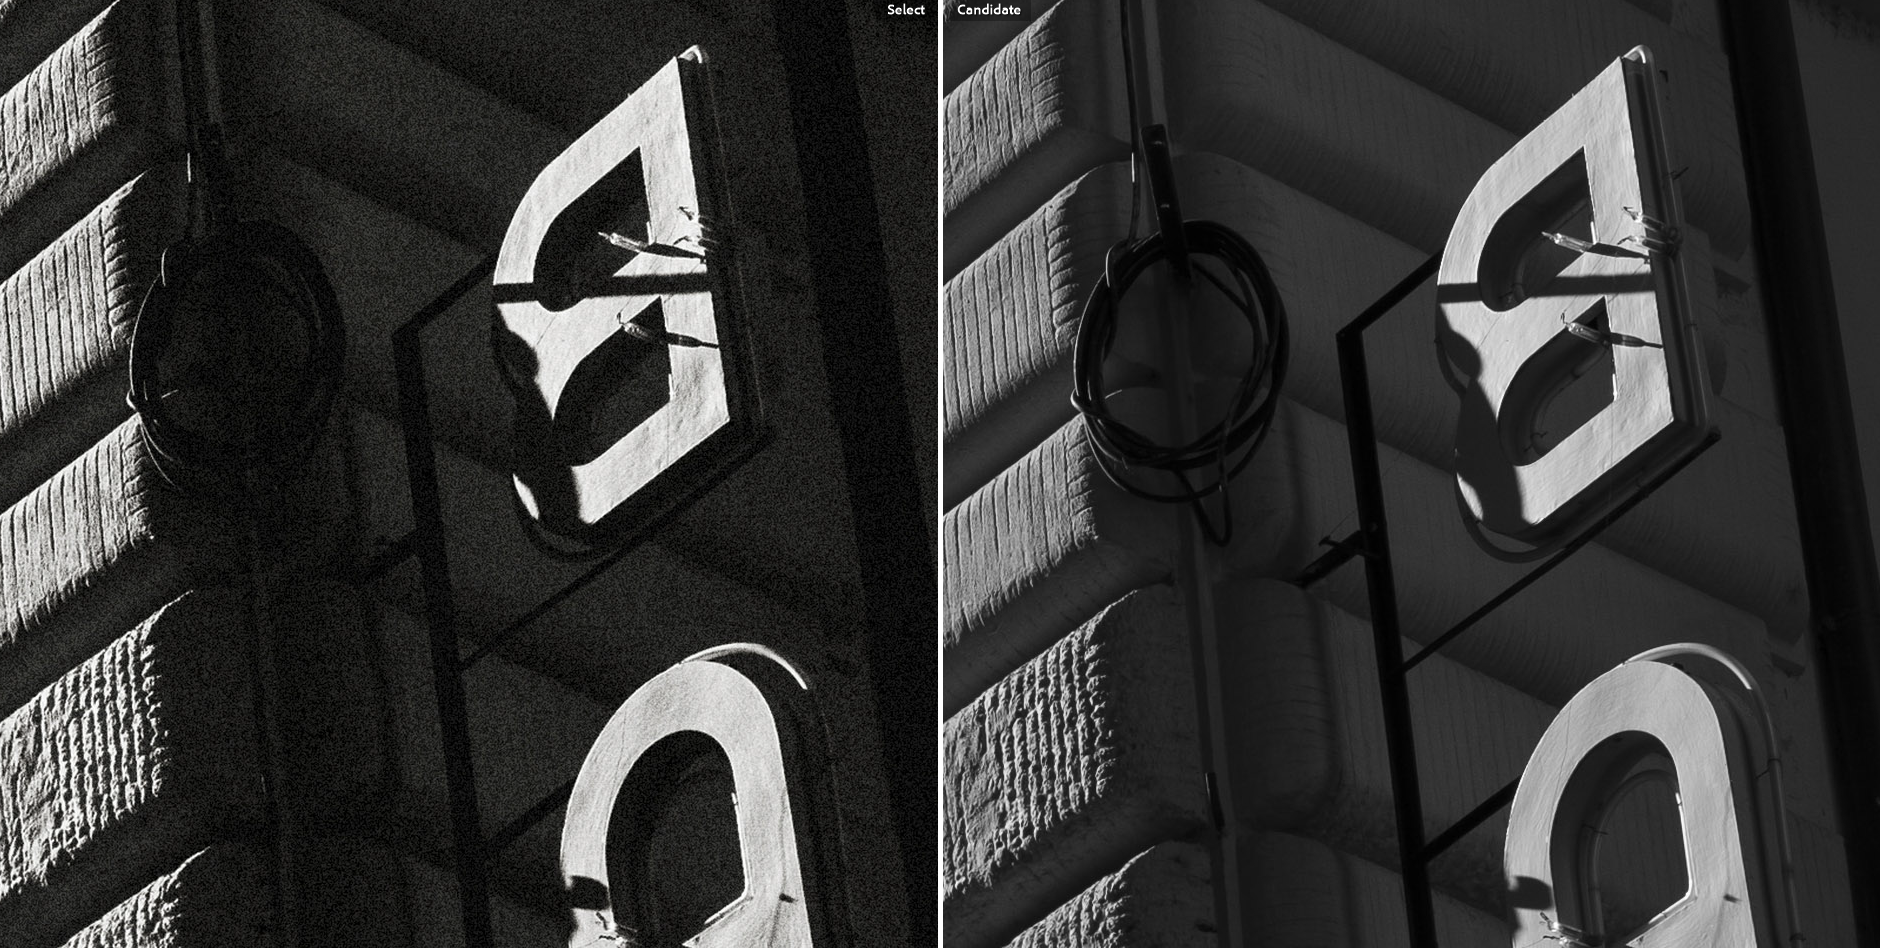
Left: Tri-X 400 Full Grain Profile applied;
Right: Original DNG file.

You can obtain the Plugin + Presets by clicking on the link above. I only ask for a small contribution.
Thanks and happy editing!